Showing posts with label make up. Show all posts

Thursday, 11 October 2012

Basic smokey eye - any colour and any eye shape!

Hi ladies!
If there's one make up related question my friends always ask me it's how to do I create simple smokey eye?

There are tones of make up tutorials for a smokey eye floating about but today I am going to show you how I learnt to create a basic and easily adapted look.
This tutorial can work for any eye shape and with any combination of colours,

With just a bit of practice and experimentation you'll have it nailed in no time!

So what will you need?

  • 3 or 4 colours (preferably the same colour in different shades) ranging from light to dark.
  • A small precision brush ( a pointed eyeliner brush or lip brush work great!)
  • An eye shadow brush to pack on colour.
  • A round fluffy brush to blend.
  • A brush of your choice to highlight the tear duct and browbone
  • Eyeliner
  • Mascara
Before we start I just want to explain to you something about pallets - the colours are placed next to each other for a reason!
Take 4 colours which are next to each other for an easy combination of colours.

Lets get started!

The colours I've used are:

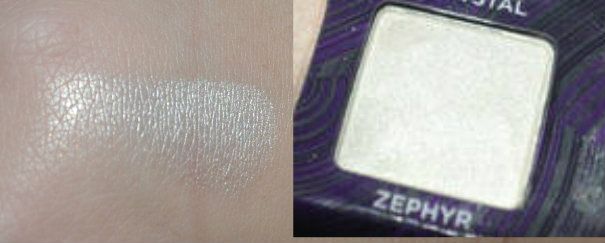
Urban Decay Zephyr - Tear Duct - Highlight
Urban Decay Crystal - Inner corner - Lightest
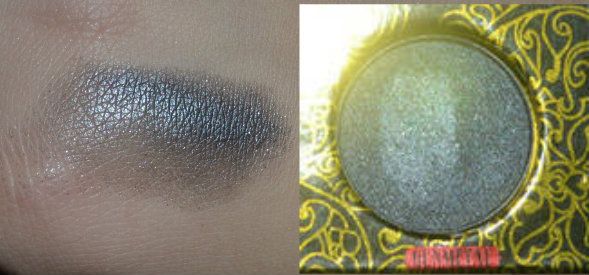
Urban Decay Gunmetal - Middle - Medium
Urban Decay Oil Slick - Outer corner - Darkest


Start by drawing the outline of where you're going to place the shadow.
Take your medium colour and your precision eye shadow brush to draw an outline of where you are going to place the shadow with your eyes open.
Where you draw your line depends entirely on your eye shape.
You can go as high or wide as you like.
By mapping out your shape like this you gather a basic idea of what the shape is going to look like.
Keep trying for your ideal shape because at this point it's easy to just wipe it off and start again.

When you're done it should look something like this:


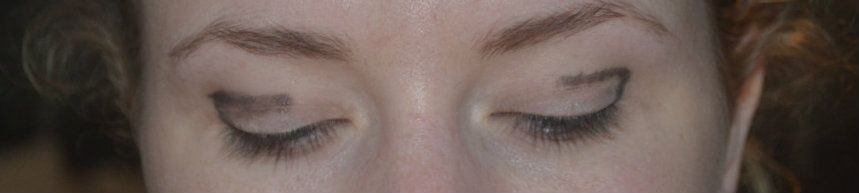
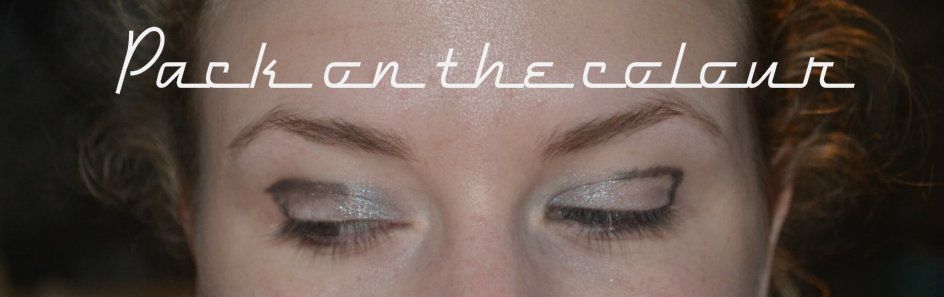
Next you need to start applying your colour.
If you are using 3 colours (excluding the highlight) then section your eyes into thirds and place your lightest colour on the inner third of your eyelid.
If you are using 4 colours (excluding the highlight) then section your eyes into quarters.


Then take your medium colour and place on the next section of your eye.
If you are using 4 colours (excluding the highlight) then apply this also in the next section along.


Lastly add your darkest shadow to the outer corner, staying in the line you created earlier.


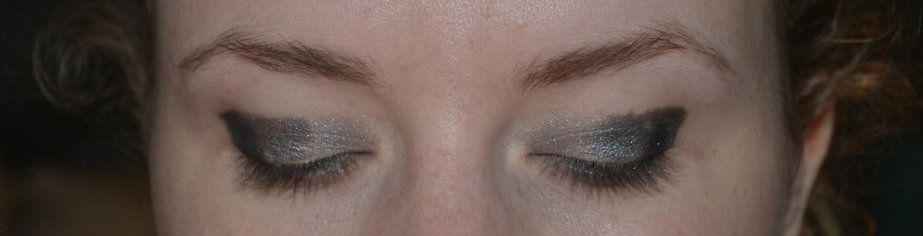
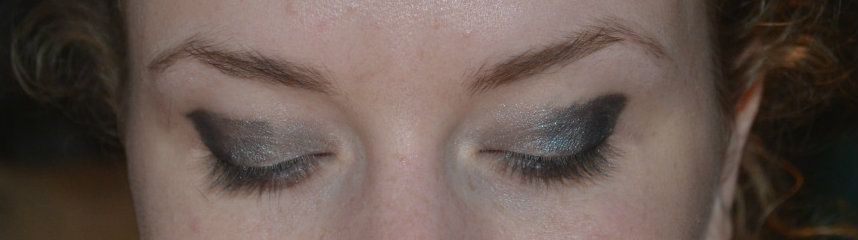
Now starting from the inside of your eye and moving outwards take your blending bush and create small circular movements to blend the colour.
You can either blend all of the shadow or just down the area where the colours are side by side depending on how dramatic you want to go. 
(all over blending gives a less dramatic look).
At this point you can play around with the shape of your eye shadow to create a bigger or blended look.


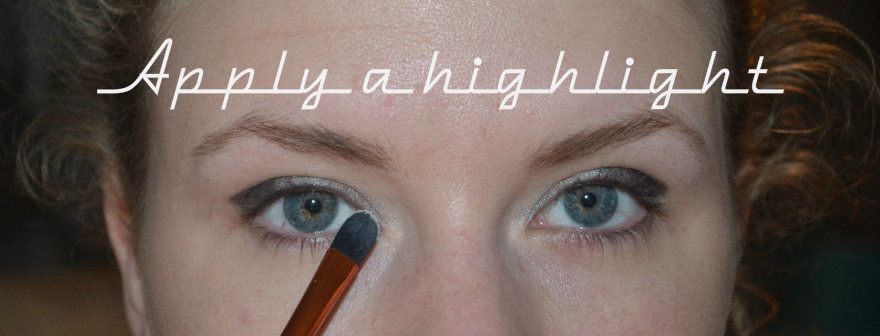
Now you are going to apply your highlight to the tear ducts and brow bone using a new brush.
Use any brush you like or favor.


Now if you are happy with the shape of your eye shadow line your lash line, tight line and waterline.
You can also line under your bottom lash line to join the darker eye shadow or use the darker shadow colour with your precision eye brush.
I'm using Urban Decay's 24/7 liner in Perversion


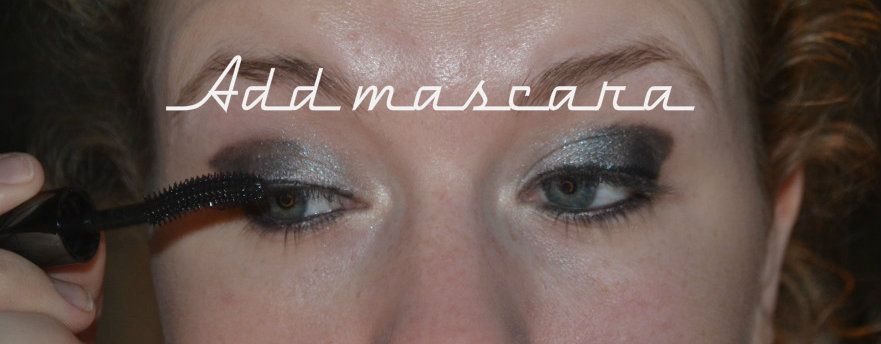
Finally add mascara and false lashes if you wish.
I'm using Urban Decay's Supercurl Curling Mascara in Black

And the finished look ..


This look can be easily adapted using different colours and can suit any eye shape.
As you get more confident you can experiment with a wider range of colours and more shades.

If you have any questions just ask!

Disclaimer
I am not a professional make up artist and these are just t tips.
This is not the only way to create a smokey eye, but the way I find easiest and most adaptable.
This is not a sponsored post, all products were purchased with my own money.


Tuesday, 18 September 2012

Autumn 2012 Make up Trends

A change in seasons means the introduction of new make-up trends!
I am a big fan of finding out the new trends for cosmetics which are generally born out of fashion week!
Now we are all aware of the way fashion week works - the start of spring gives us Autumn/ Winter trends and vise versa and with London Fashion Week coming to a close I've decided to take a look back to last fashion week and have a look at the make up trends!

So without further ado!


Berry Lips

Source
This is a trend that rolls round year after year and 2012 has been no exception.
When aiming for your perfect berry lip the idea is to make your lips appear as if you've just bitten into a bunch of blackberries.
I love the look and think it look fantastic on light and dark skin tones.
The contrast on a pale face make you look super sophisticated and on trend where as berry lips on a darker skinned person adds a subtle hint of glamour.


Multi-Toned Eyes

Source
This futuristic look adds a different dimension to eye make up looks than the usual smokey eye.
Its the new way to do glamorous eye make up and finally allows that bit of adventure into out make up bags!
Jason Wu used emerald green as the main colour for this make up look on his catwalk this season.

Fresh & Natural

Source
This is another look we see year after year throughout each season.
However the look for Autumn features more on 'the English rose' look. Flawless skin and a flush of colour to the cheeks. 
Whilst flushed cheeks are a sign of broken capillaries from cold weather a spot of blusher gives a much healthier look to the face.

Smokey Brown

Source
This is a look that I have been wearing so much for the past few months and don't plan on stopping any time soon.
However I think I will incorporate some of the other new trends we are seeing in order to bring the look up to date and give it a new lease of life.
It is such a versatile trend and can be taken from day to night really easily.

The morning after make up

source
This trend looks pretty intimidating to me! 
It's based on the concept of not removing last night's make up and featured heavily on the runway with the likes of Louis Vuitton, Jean Paul Gaultier and Marc Jacobs. 
Whilst the run way look is not something I'd go for, a more of a smudged look on the lower lash line is the perfect compromise and I can't wait to try it out.


Vibrant eye liner


Source
This is a trend we saw back in spring 2011.
It's back again with a vengeance!
Go for bold patterns in bold colour for a bang on trend look. I personally cant wait to try this look with blues and greens!

Which is your favourite make up look, and if any, which will you be trying out over the next 3 months?


Friday, 7 September 2012

How to take any make-up look from day to night!

The blogosphere and You tube is full of tutorials of how to take particular make-up looks from day to night.
I am a big fan of looks I can easily transition from a natural day look to a glam night look and now that I'll be starting back at Uni soon it's so handy to know what to do to your make-up to take it from the lecture theatre to the SU.

Here's a few tips for how to take any look from day to night.


When applying your day time look:

Go for Flawless skin
This will easily transition into the night time glam look
Set Your Make up well
You want your foundation to last so use a good finishing spray over the top of your foundation
Go for lashes
Make your lashes look big and full as it can be difficult to apply a second coat of mascara at the end of the day

For my day time look I've used

Rimmel Match Perfection Cream Gel Foundation
No7 Mineral Blush - Rose Pink
Sleek Brow Kit - Light
Inika Eyeliner - Coco
Maybelline The Falsies Volume Express Mascara - Black
Lancome - Juicy Tube - Chai Freeze


When Transitioning your look:
Add Eyeshadow/Liner
A darker eye look will instantly add drama to your look
A Bold Lip
A strong red, pink or coral is great for the night time look even if it's the only thing you do
Where you put blusher
Instead of on the apple of your cheeks, place your blush on your cheek bone, just above where you contour
Contour
Add in a bit of bronzer under your blush, if your short for space just use the same brush

For my night time look I applied these products over the top of my day time look

Topshop Blush - Prime Time
Benefit Hoola Bronzer (mine is a sample size which is great for carrying in your bag, I also used it on my eyelids)
ELF Shimmering Facial Whip - Lilac Petal
MUA Lipstick - Shade 1
Maybelline Colour Tattoo - On and On Bronze
Real Techniques Stippling brush
ELF Professional Blending Brush


So ladies, if you follow those few guidelines then you will have no problem transitioning your look from day to night with minimal products and effort!

What are your top tips for glamming up for make-up look?
x

P.s. Keep your eyes peeled for a similar fashion post!

Wednesday, 8 August 2012

My Perfect Nude Lip (for less than £3!)

Nude Lips
You either love them or you hate them.

I love the look. On other people.


I've found it really hard to find a good combination of lipstick and lip gloss that I'm happy with.

But I've finally settled on a bargain duo!

What are these wonderful products?


Sally Hansen Natural Butter Lip Shine - Lush
Natural Collection Lipstick - Rose Petal


The lip gloss came from Poundland! In a pack with 2 other Sally Hansen Products. Costing me 33.p!
The Natural Collection Lip Stick is from Boots and costs £1.99.


Swatchy Swatchy


Nude Lips can be a hard look to get right and some of you may not like my Nude lip look.

What is your perfect nude lip product/combination?
x

Friday, 3 August 2012

Collective Haul

I've been trying so desperately to save money lately but something always comes up!
I've done a bit of shopping lately and it's all been pretty friendly on the purse!

So without further-a-do here's the goodies:
These are the first of my Poundland buys.
Left - Rimmel Moisture Renew Lipgloss - 585 Cherry Bloom
Middle - Claudia Stevens Eyelash primer
Right - Stila - Hair referesher Dry Shampoo

Also from Poundland I bought:

Collection 2000 SkyScraper Mascara
This costs £5 in superdrug and I love this mascara so I was very pleased to find it in the pound shop!

NYC Foundation Stick Concealer

Stila Powder Foundation refil - Shade b

From Superdrug I picked up:

MUA Mosaic Bronzer £2.50

MUA Eyey brow Pencil 'Brunette' £1


Superdrug Face masks
L- Hydrating Self0heating Mask
M- Deep Cleansing Fruit Mask
R - Tropical Cocktail Peel-off Mask
99p each

From E-bay

 (Via my sister who gave them to me) 
3D Nail Wraps £1 each (I think)

Dipped Hem skirt £6.49
check out my recent blog post about my ebay buys.

H&M:

Sparkly over sized T-shirt £3

So all these goodies cost me £21.99!
Bargain!

So what have you guys been buying recently?
x

p.s, Look out for one or two of these products being featured in my 100 follower give away (when we get to 100)!


Wednesday, 30 May 2012

Bare Minerals

Since buying the No7 Mineral Blusher I have been looking for more mineral products.
I thought a good place to start was the bare minerals counter in Debenhams!
Whilst there I spotted this fantastic deal that was too good to pass up and had to share it with you!


This 9-piece starter Kit retails for £49.
Now I know if you don't have £50 readily available then its not cheap! But honestly it is so worth it!


In the box you will get:
2 shades of the original foundation 
Bronzer
Mineral Veil
Primer
3 Make up brushes
Instructional DVD

Now here is where you get the bargain. The girl at the counter told me that the brushes alone are worth £57!
There you go - more than your monies worth.

Right so what do we have?
The light kit comes with two foundations:
Original Foundation - Light W15
Original Foundation - Fairly Light N10
The purpose of this is so that in the summer when you tan you can still use Bare minerals foundation, just in the darker shade.
I love this idea as it means you don't have to purchase another foundation just for summer which might not even match your tan!


each product is 2g. 
The foundation retail sizes are 8g and £24 
The mineral veil retails in a 6g pot for £20
The bronzer however is 1.5g - which is what you get in the box - and retails for £19

And finally, the primer.
The retail size is 30ml and the size in the box is 15ml.
30ml retails for £19

So after doing some maths - you receive around £45 worth of product.
Add that to the £57 worth of brushes..

a saving of £53.
And on top of that you receive an instructional DVD and booklet!

Keep your eyes peeled for a review!
x


Thursday, 24 May 2012

Summer Make-up Tips


Yay! we have sun here in England!
Today is forecast to hit 26c (79f) which is great, but how do you effectively wear make up in the heat?

Here are just a few tips that I use in the summer!

Keep Make Up to a minimum 
If you need coverage use more concealer and a lighter foundation.
I tend to wear tinted moisturiser (or mix my regular foundation with moisturiser) but this year its all about BB cream!

Use versatile products! 
 I like a pink lip in summer so I whip out my favourite pink lipstick, sweep it across my lips and then dab some on my cheeks! A blush and a lip product in one! 
Also if you apply the lipstick to your finger first, you can sweep it across your eyelid for something extra!

Cream products
Cream based products are much easier to control in the summer than liquid or powder based ones. The formula means it will stick around longer and should it crease or start looking sweaty, you can just blend it in again using your finger.

Use sunscreen
We might like the bronzed look but it is no good for your skin!
Fake tanners are so advanced right now so (at least for your face) slap on the SPF.

Face Mist
Even if it's just water in a spray bottle I find having a small bottle of face mist in my bag is a great help in summer for helping you freshen up!

Water!
Drink it! Keeping yourself hydrated will not only help your skin to look better but it will help you to feel much better in the heat!

Vaseline
If you're one of those people who sweats as soon as the sun comes out then sweat getting in your eyes and spoiling your make up can be a major pain! 
If you put vaseline on your eyebrows it will act as a barrier against the sweat dripping down.

Have you got any summer beauty tips? Please share as I would love to know!
x


Related Posts Plugin for WordPress, Blogger...